Pages

Sunday, February 19, 2012

Be Mine. (Or not. It's up to you.)

Red and white, what a delight.
Another Valentine's Day has come and gone. I survived, thankfully, but barely. I have a love-hate relationship with Valentine's Day. On the one hand, I hate having romance thrown in my face only to be reminded that I've never had a Valentine. On the other hand, I can't resist the pinks and reds and hearts, reminders of my childhood. Remember those yummy red heart lollipops? And Valentines with my name misspelled in every way imaginable (Realch- really?!). These are the souvenirs of a simpler time, a time when I believed in Valentines. A time when I believed that it was just a matter of time before I found my true love. I believed in love then.

Now, though, I don't know what to believe. I've never known love and I don't know if I ever will. I don't have a good track record. Okay, so I have no record at all. Love is just something that happens to other people. It just doesn't happen to me. One of my favorite quotes from The Amber Spyglass (which is the third book in one of my favorite trilogies, His Dark Materials-read it now if you haven't already!) by Philip Pullman is the following: "Being in love was like China: you knew it was there, and no doubt it was very interesting, and some people went there, but I never would. I'd spend all of my life without ever going to China, but it wouldn't matter, because there was all the rest of the world to visit." I think that about sums up my feelings on the subject.

And so this year, I decided to focus on my parts of the world: baking and dancing. I made some red velvet cupcakes for my bellydance class (and my coworkers). There really is so much joy to be had in giving. I love sharing the treats that I have baked, and seeing others' surprise and excitement. If I can do this much, bring happiness to the world in my little way, well then, I can say that I'm not doing too badly.

Cupcake has a cupcake shadow!
Red Velvet Cupcakes
slightly adapted from Martha Stewart's Cupcakes

2 1/2 cups cake flour, sifted
2 tbsp Dutch-processed cocoa powder
1 tsp salt
1 1/2 cups sugar
1 1/2 cups vegetable oil
2 lrg eggs, room temp
1 bottle red food coloring
1 tsp vanilla extract
1 cup buttermilk
1 1/2 tsp baking soda
2 tsp distilled white vinegar

Preheat the oven to 350 degrees F. Line two standard muffin tins with cupcake liners. Whisk together the first 3 ingredients.

Using an electric mixer fitted with the whisk attachment on medium speed, mix the sugar and oil until combined. Add the eggs one at a time, beating until each is incorporated. Mix in the vanilla and food color.

Reducing the speed to low, add the flour mixture in 3 batches, alternating with two additions of buttermilk. Stir together the baking soda and vinegar in a small bowl (you'll get a fun little frothy reaction), and mix into the cake batter on medium speed for 10 seconds.

Divide the batter evenly among the cups and bake, rotating half way through, for about 20 minutes. Transfer to wire racks and cool completely.

Cream Cheese Frosting
adapted from Martha Stewart's Cupcakes

2/3 cup unsalted butter, room temp
8 oz cream cheese, room temp
4 cups powdered sugar, sifted
1 tsp vanilla extract

Using an electric mixer fitted with the whisk attachment, beat the butter and cream cheese until fluffy. With the mixer on low speed, gradually add the sugar a 1/2 cup at a time, then add the vanilla. Beat until smooth and combined. Frost the cupcakes using and offset spatula, or using a pastry bag fitted with your favorite decorating tip. Add sprinkles and enjoy!

Monday, February 6, 2012

Woodland Baby Shower

Awesome chalkboard from the craft store.
In case you didn't know, my sister is having a baby. It's kind of a big deal. Things will change. Priorities will shift. Attention will be diverted. And I will get a new nephew!
A little bit of love.
I already have two very adorable nephews whom I love very, very much. As in, so much that I never knew was possible. Sometimes its so much that I want to eat their cute little chubby cheeks, but I have pretty good self-control. Instead I just cover their squishy cheeks with kisses. And I can't wait to do that with my sister's baby when he arrives.
Sign made with wood blocks and scrapbooking paper.
Said baby will be named Fox (as in Fox Mulder), so naturally, my sister wishes to decorate the nursery in a woodland theme. And thus, I threw my sister a woodland-themed baby shower. I wanted to use decorations that my sister could then use in the nursery. I like things that are multi-purpose.

The famous stump cake!

I knew right away that I would make some kind of log cake, and ended up going with this fabulous stump cake and decorated it with meringue mushrooms. As for the rest of the food, since it was a mid-afternoon affair, I went with snackables like fruit salad, veggies with dip, and assorted nuts. And punch! What is a party without punch, after all?


Lime-grapefruit punch.
It's a mushroom! It's meringue!
It's a shy little mushroom.
Mason jar, moss ribbon, string, dirt, and a votive candle.
Aw, nuts!

Note: I did not take any of these photographs. A very good friend of mine was kind enough to come take some pictures for me.

Sunday, January 29, 2012

Chocolate Cake with Chocolate Frosting (because they don't make band-aids for your heart)

Mmm...nice and round...
Happy New Year! A little late, I know, but I've been busy. Actually, I was sick there for awhile. First it was shingles, which kept me away from my nephews. Sadly, my newest nephew decided to arrive right when I was at my most contagious, so I had to wait a week to meet him. But meet him I did, and he's as sweet as can be.

Normally I start out every new year with some grand resolution, something to bring about fantastic change in my life. Given that last year's aspirations failed miserably, this year I decided to go a little more low-key. My only resolutions this year are to just stay true to myself, and live a story worth telling. It turns out that living a story like that means ignoring what other people say is the right or acceptable way to do things. So I'm going to do things my way, and if I offend anyone in the process, then they don't belong in my story.

This year, I am going to throw everything I have into the universe. I'm interested to see what I get in return. On that note, I offer the universe this chocolate cake. It doesn't necessarily mend a broken heart, but it does soothe it a little. It's a simple and easy to make chocolate cake. Light, fluffy, and moist, with a sweet, chocolatey frosting. The kind of cake you can eat a large slice of without feeling terribly guilty afterward.

Slice of awesome.
Chocolate Cake
from the back of the Hershey's Cocoa can

2 cups sugar
1 3/4 cup all-purpose flour
3/4 cup natural cocoa powder
1 1/2 tsp baking powder
1 1/2 tsp baking soda
1 tsp salt
2 eggs
1 cup milk
1/2 cup vegetable oil
2 tsp vanilla extract
1 cup boiling water

Preheat the oven to 350 degrees F. Grease and flour two 9-inch round baking pans.

Combine the dry ingredients in the bowl of a stand mixer and mix until blended. Add the eggs, milk, oil, and vanilla (which I forgot...) and beat on medium speed for 2 minutes. Stir in the boiling water and pour into the prepared pans.

Bake for 30-35 minutes, until the cake springs back when lightly touched and a toothpick inserted in the center comes out clean. Cool for 10 minutes, then turn onto wire racks to cool completely.

Chocolate Frosting
from the back of the Hershey's Cocoa can

1 stick unsalted butter, softened
2/3 cup natural cocoa powder
3 cups powdered sugar
1/3 cup milk
1 tsp vanilla extract

Melt the butter in a small saucepan over low heat. Pour the butter into the bowl of a stand mixer and beat in the cocoa. Alternately add the powdered sugar and milk until smooth and fluffy, with the mixer on medium speed. Stir in the vanilla. Frost and serve.

Enjoy!

Don't you want me, baby?

Saturday, December 31, 2011

Racines Cake for Christmas Eve

Mmmm...chocolate...
Welcome to my last post of 2011, a year that shall go down in (my) history as one of my least favorites. It was filled with anxiety, depression, heartache, disappointment, loneliness, and frustration. True, there were a few upsides (trip to Paris, anyone?), but in all, it was a year I wouldn't mind forgetting.

So instead of reflecting on the year that was, I would like to look forward to the year that will be. Granted, I started of 2011 with a great deal of optimism for what was sure to be a great year to come, but I am certain that 2012 has better things in store for me than 2011. I am hoping that my falling apart in 2011 only created an opportunity for me to put myself back together in a more fabulous shape in 2012.

So, in parting with 2011, I leave you with a recipe for a most delicious and simple chocolate cake. I wish I had thought to pair it with a peppermint whipped cream, since I served it on Christmas Eve, but it was just as delicious with the orange flower-scented whipped cream that I made. For me, this cake was simply perfect: light, chocolatey, and decadent. Fancy enough for a celebration, but simple enough to pull together in a pinch.

So fancy!
Racines Cake
from Ready for Dessert

10 oz bittersweet chocolate (I used 70%), chopped
1 stick unsalted butter, cut into pieces
1 tbsp freshly brewed espresso
1/2 tsp vanilla extract
6 lrg eggs, at room temp
1/4 cup plus 2 tbsp granulated sugar
2 tbsp cocoa nibs

Preheat the oven to 350 degrees F. Prepare a 9-inch springform pan by buttering it and dusting it with cocoa powder.

In a large heatproof bowl, combine the chocolate, butter, and espresso and melt over a pan of simmering water. Stir until smooth, then remove from the heat and add the vanilla.

In a smaller bowl, combine the egg yolks and 1/4 cup sugar and beat on medium-high speed with a hand mixer until the mixture is light and creamy, about 1 minute.

In a clean, dry medium-sized bowl, beat the egg whites on low speed until they begin to hold shape. Add the 2 tbsp sugar and beat on high speed until the whites hold soft peaks.

Fold the egg yolks into the chocolate mixture, then fold in half of the egg whites. Carefully fold in the remaining whites until there are no streaks of white- don't overfold!

Scrape the batter into the prepared pan, then sprinkle the cocoa nibs evenly over the top. Bake until the cake is barely set in the center, abut 25 minutes. Let cool completely.

Enjoy!

Tuesday, December 27, 2011

Christmas Cookies 2011

Hazelnut Yumminess!
Yes, I'm a little late with my Christmas cookie post. Fashionably late, perhaps? No, probably not. I'm sure everyone is tired of Christmas cookies by now. But I'm here now to share my Christmas cookie creations of 2011.

Oooooh...
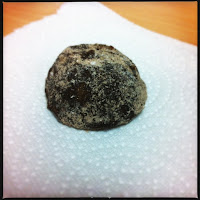
The first cookie is inspired by the Chocolate Mexican Wedding Cookies that I made last year. I'm not a huge fan of pecans, but what I do love are hazelnuts. I thought if I swapped out the pecans for hazelnuts, that I would have a delicious Nutella-flavored cookie. And I was right. With the first bite into this creation, I was in love. We all know about my Nutella addiction, so it's pretty clear why these cookies were a hit with me. They also seemed to be a bit of a hit at work. And because they remind me of Ferrero Rochers,I am naming these little guys Rocher Cookies.

The other cookies is a hazelnut thumbprint cookie, using some of my mom's homemade Blackberry Port Jam (which, on its own, is amazing). I found a recipe online and it worked perfectly. The result was a crispy, buttery, hazelnutty, jammy cookie. It would be perfect with tea. I think my mom's jam paired rather nicely with the hazelnuts in this cookie. For the recipe, see this blog; note: I followed the recipe using hazelnuts and did not use almond extract. Almond extract is the devil.

They taste better than they look...
Rocher Cookies
adapted from The Ghirardelli Chocolate Cookbook

1 cup unsalted butter, at room temp.
1/3 cup powdered sugar
2 tsp pure vanilla extract
1 3/4 cups all-purpose flour
1 cup ground roasted hazelnuts
1/2 cup Ghirardelli Sweet Ground Chocolate and CocoaPinch of salt

1/2 cup powdered sugar
1/4 cup Ghirardelli Sweet Ground Chocolate and Cocoa

To make the cookies, in a large bowl, cream the butter and powdered sugar with an electric mixer until light and fluffy. Add the vanilla.

In a separate bowl, stir together the flour, hazelnuts, ground chocolate, and salt. Gradually add the dry ingredients to the creamed mixture and mix until well blended.

Wrap the dough with plastic wrap and chill for 1 to 2 hours, until firm.

Preheat the oven to 325 degrees F.

Shape the dough into 1-inch balls (I used a 1-inch scoop). Place the balls 1 inch apart on an ungreased baking sheet. Bake for 15 to 18 minutes, until the cookies are firm to the touch. Cool for 1 minute on the cookie sheet, and then transfer to a wire rack.

To make coating, sift powdered sugar and ground chocolate into a shallow bowl. While the cookies are still warm, roll them in the coating.

Enjoy!

Wednesday, December 21, 2011

Orange Nutmeg Buttermilk Cookies

Magical!
So, it's been awhile. A long while. I've had writer's block. I've also had a lot of things on my mind that have nothing to do with my baking, or at least nothing writeable. But I'm back now, and I suppose that's what matters.

Without delving too much into things, I will say that I have been dealing with depression for the past year, and went on medication for it in the past few months. One of the most annoying side effects of the medication was fatigue, to the point that I was sleeping until anywhere between noon and 2pm on weekends. I had lost all energy to do much of anything. My apartment turned into quite a pigsty, which was rather representative of how I felt on the inside.

Something that I have found when I tell someone that I have depression, is that the person's response is "what are you depressed about?" I am sure that the person is trying to get to the problem so that they can offer a solution, but sometimes when I am depressed, it isn't about anything really. Or maybe it's about everything. Some days I simply wake up feeling a sense of dread, like my body is filled with a black ooze that takes over my mind and tells me that I'm a nobody who will never do anything significant. Maybe the answer I should give to those who ask is that the future is scary as shit.

One thing that helps me keep going, however, is my baking. I love thinking about what I want to bake, concocting magical treats in my mind. Sometimes, I will make those ideas a reality. One such delicious treat is these orange nutmeg buttermilk cookies that I made a couple of weeks ago with my sister. I love the combination of orange and nutmeg, and these cookies are a wonderful way to enjoy that taste combination. The cookies are light and kind of cakey (sort of like a whoopie pie cake), with a little sweetness added by the orange glaze on top. We decorated the cookies with festive sprinkles in order to help get us into the holiday spirit. I highly recommend these to anyone- they're fairly easy to make, delicious, and a little unexpected.


Merry Christmas!

Orange Nutmeg Buttermilk Cookies

For Cookies
3 cups all-purpose flour
1 tsp grated orange zest (more if you wish)
1/2 tsp baking soda
1/2 tsp nutmeg
1/2 tsp salt
1 1/2 sticks unsalted butter, softened
1 1/2 cups granulated sugar
2 large eggs, at room temp
1 tsp pure vanilla extract
2/3 cup well-shaken buttermilk

For Glaze (this is half the original recipe, which I find is more than enough to frost the cookies)
3/4 cup confectioners sugar
1 tbsp well-shaken buttermilk
1/2 tbsp fresh orange juice

Make cookies:
Preheat oven to 350°F with one rack in the upper-middle position and the other rack in the lower-middle position. Line 2 large baking sheets with parchment paper.

In a medium bowl, whisk together flour, zest, baking soda, nutmeg, and salt.

Using an electric mixer, beat together butter and sugar in a large bowl until pale and fluffy. Add eggs 1 at a time, beating well after each addition, then beat in vanilla. Mix in flour mixture and buttermilk alternately in batches at low speed, beginning and ending with flour mixture, until smooth.

Drop tablespoons of dough about 1 1/2 inches apart onto baking sheets. Bake, 2 sheets at a time, until cookies are puffed and edges are golden, 12 to 15 minutes per batch, making sure to rotate the baking sheets halfway through the bake time. Cool cookies on sheets 1 minute, then transfer cookies to racks.

Glaze cookies:
Whisk together all glaze ingredients and brush onto tops of warm cookies. Add a flourish of sprinkled if you are so inclined.

Let stand until cookies are completely cooled and glaze is set.

Wednesday, November 9, 2011

More Brownie Pimping

Yes, I am trying to seduce you.
Oops, so it's been a few weeks since I've posted. I did make another batch of pimped brownies, but I got a little too excited about eating them...so I didn't get any pictures.

I also happened to have had a birthday in the meantime, so I didn't really do any baking that weekend. I did make ice cream (can't help myself), but it also disappeared before pictures were taken...

So yeah, I'm 29 now. In a year, I'll be 30. My metabolism is going to slow down. I will no longer be young and hip (okay, I was never hip). I would have thought I'd have my life a little more together by now, but I don't. I don't have a career to speak of (yay, economy!), I don't have a house, and I am perpetually single. But I do have a car! I also have a family that makes me laugh, a sister who is like a soul mate, a few good friends who love me despite my quirks, a dog that makes my heart tickle when I look at her, a cat who provides me with endless entertainment, and a passion for baking and dancing. So really, when I think of all that, I'm pretty rich, right?

To be honest, 28 was a rough year, and I was glad to see it go. Living alone has taught me a lot about myself. I've learned that I'm a pack animal, that I feel most at home with a small group. I've learned that the state of my apartment is a direct reflection of the state of my mind. I've also learned to reach out when I need help, a tough lesson for an independent girl like me to learn. 28 wasn't all bad, but I am certainly glad to have it behind me.

Now, for some brownies. No matter my age, I am still a brownie freak. A friend of mine suggested that the road to hell is paved with brownies, and I fear that that may be the gospel truth. Not much good comes of me baking and eating brownies, in the moral sense. We all know how it goes- you eat one piece, then go back for another little sliver, and another sliver, and before you know it, half the pan is gone and you wind up in a chocolate-induced stupor.

But I digress. I am still on a brownie-pimping kick and this time I think I've created something wonderful. I used the same base from my Milky Way Brownies, and this time doctored things up by adding a tablespoon of cocoa powder in exchange for one of the tablespoons of flour, and a half teaspoon of espresso powder. I also added a half cup of semisweet chocolate chips to the batter and sprinkled a mixture of milk chocolate, semisweet, bittersweet, and white chocolate chips on top of the batter before putting it in the oven. The result is divine (or downright evil, depending on your take). Maybe I should name these Quadruple Chocolate Seduction Brownies...

Eat me!
Quadruple Chocolate Seduction Brownies


4 oz semi-sweet chocolate, chopped
1 stick unsalted butter, cubed
1/2 tsp espresso powder
1 cup firmly packed light brown sugar
1 tsp vanilla extract
2 lrg eggs
3/4 cup + 1 tbsp all-purpose flour
1 tbsp cocoa powder
1/4 tsp baking powder
1/2 tsp salt
1/2 cup + 1/4 cup semisweet chocolate chips
1/4 cup milk chocolate chips
1/4 cup bittersweet chocolate chips
1/4 cup white chocolate chips

Preheat the oven to 350 degrees F. Line an 8-inch square baking pan with tin foil, then spray with a non-stick cooking spray.

Melt the butter in a small saucepan until foamy. Stir in the semisweet chocolate until smooth. Add the espresso powder and set aside to cool.

Stir the brown sugar and vanilla into the chocolate mixture. Add the eggs and stir until well-combined.

Sift together the flour, cocoa powder, baking powder, and salt. Slowly fold the flour mixture into the chocolate mixture. Stir in the 1/2 cup of semisweet chocolate chips. Pour the batter into the prepared pan. In a small bowl, combine the remaining chocolate chips, then sprinkle evenly on top of the batter.

Bake for 25-30 minutes, or until a tester comes out clean. Allow to cool completely (or for as long as you can bear).