Pages

Saturday, December 31, 2011

Racines Cake for Christmas Eve

Mmmm...chocolate...
Welcome to my last post of 2011, a year that shall go down in (my) history as one of my least favorites. It was filled with anxiety, depression, heartache, disappointment, loneliness, and frustration. True, there were a few upsides (trip to Paris, anyone?), but in all, it was a year I wouldn't mind forgetting.

So instead of reflecting on the year that was, I would like to look forward to the year that will be. Granted, I started of 2011 with a great deal of optimism for what was sure to be a great year to come, but I am certain that 2012 has better things in store for me than 2011. I am hoping that my falling apart in 2011 only created an opportunity for me to put myself back together in a more fabulous shape in 2012.

So, in parting with 2011, I leave you with a recipe for a most delicious and simple chocolate cake. I wish I had thought to pair it with a peppermint whipped cream, since I served it on Christmas Eve, but it was just as delicious with the orange flower-scented whipped cream that I made. For me, this cake was simply perfect: light, chocolatey, and decadent. Fancy enough for a celebration, but simple enough to pull together in a pinch.

So fancy!
Racines Cake
from Ready for Dessert

10 oz bittersweet chocolate (I used 70%), chopped
1 stick unsalted butter, cut into pieces
1 tbsp freshly brewed espresso
1/2 tsp vanilla extract
6 lrg eggs, at room temp
1/4 cup plus 2 tbsp granulated sugar
2 tbsp cocoa nibs

Preheat the oven to 350 degrees F. Prepare a 9-inch springform pan by buttering it and dusting it with cocoa powder.

In a large heatproof bowl, combine the chocolate, butter, and espresso and melt over a pan of simmering water. Stir until smooth, then remove from the heat and add the vanilla.

In a smaller bowl, combine the egg yolks and 1/4 cup sugar and beat on medium-high speed with a hand mixer until the mixture is light and creamy, about 1 minute.

In a clean, dry medium-sized bowl, beat the egg whites on low speed until they begin to hold shape. Add the 2 tbsp sugar and beat on high speed until the whites hold soft peaks.

Fold the egg yolks into the chocolate mixture, then fold in half of the egg whites. Carefully fold in the remaining whites until there are no streaks of white- don't overfold!

Scrape the batter into the prepared pan, then sprinkle the cocoa nibs evenly over the top. Bake until the cake is barely set in the center, abut 25 minutes. Let cool completely.

Enjoy!

Tuesday, December 27, 2011

Christmas Cookies 2011

Hazelnut Yumminess!
Yes, I'm a little late with my Christmas cookie post. Fashionably late, perhaps? No, probably not. I'm sure everyone is tired of Christmas cookies by now. But I'm here now to share my Christmas cookie creations of 2011.

Oooooh...
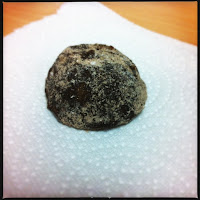
The first cookie is inspired by the Chocolate Mexican Wedding Cookies that I made last year. I'm not a huge fan of pecans, but what I do love are hazelnuts. I thought if I swapped out the pecans for hazelnuts, that I would have a delicious Nutella-flavored cookie. And I was right. With the first bite into this creation, I was in love. We all know about my Nutella addiction, so it's pretty clear why these cookies were a hit with me. They also seemed to be a bit of a hit at work. And because they remind me of Ferrero Rochers,I am naming these little guys Rocher Cookies.

The other cookies is a hazelnut thumbprint cookie, using some of my mom's homemade Blackberry Port Jam (which, on its own, is amazing). I found a recipe online and it worked perfectly. The result was a crispy, buttery, hazelnutty, jammy cookie. It would be perfect with tea. I think my mom's jam paired rather nicely with the hazelnuts in this cookie. For the recipe, see this blog; note: I followed the recipe using hazelnuts and did not use almond extract. Almond extract is the devil.

They taste better than they look...
Rocher Cookies
adapted from The Ghirardelli Chocolate Cookbook

1 cup unsalted butter, at room temp.
1/3 cup powdered sugar
2 tsp pure vanilla extract
1 3/4 cups all-purpose flour
1 cup ground roasted hazelnuts
1/2 cup Ghirardelli Sweet Ground Chocolate and CocoaPinch of salt

1/2 cup powdered sugar
1/4 cup Ghirardelli Sweet Ground Chocolate and Cocoa

To make the cookies, in a large bowl, cream the butter and powdered sugar with an electric mixer until light and fluffy. Add the vanilla.

In a separate bowl, stir together the flour, hazelnuts, ground chocolate, and salt. Gradually add the dry ingredients to the creamed mixture and mix until well blended.

Wrap the dough with plastic wrap and chill for 1 to 2 hours, until firm.

Preheat the oven to 325 degrees F.

Shape the dough into 1-inch balls (I used a 1-inch scoop). Place the balls 1 inch apart on an ungreased baking sheet. Bake for 15 to 18 minutes, until the cookies are firm to the touch. Cool for 1 minute on the cookie sheet, and then transfer to a wire rack.

To make coating, sift powdered sugar and ground chocolate into a shallow bowl. While the cookies are still warm, roll them in the coating.

Enjoy!

Wednesday, December 21, 2011

Orange Nutmeg Buttermilk Cookies

Magical!
So, it's been awhile. A long while. I've had writer's block. I've also had a lot of things on my mind that have nothing to do with my baking, or at least nothing writeable. But I'm back now, and I suppose that's what matters.

Without delving too much into things, I will say that I have been dealing with depression for the past year, and went on medication for it in the past few months. One of the most annoying side effects of the medication was fatigue, to the point that I was sleeping until anywhere between noon and 2pm on weekends. I had lost all energy to do much of anything. My apartment turned into quite a pigsty, which was rather representative of how I felt on the inside.

Something that I have found when I tell someone that I have depression, is that the person's response is "what are you depressed about?" I am sure that the person is trying to get to the problem so that they can offer a solution, but sometimes when I am depressed, it isn't about anything really. Or maybe it's about everything. Some days I simply wake up feeling a sense of dread, like my body is filled with a black ooze that takes over my mind and tells me that I'm a nobody who will never do anything significant. Maybe the answer I should give to those who ask is that the future is scary as shit.

One thing that helps me keep going, however, is my baking. I love thinking about what I want to bake, concocting magical treats in my mind. Sometimes, I will make those ideas a reality. One such delicious treat is these orange nutmeg buttermilk cookies that I made a couple of weeks ago with my sister. I love the combination of orange and nutmeg, and these cookies are a wonderful way to enjoy that taste combination. The cookies are light and kind of cakey (sort of like a whoopie pie cake), with a little sweetness added by the orange glaze on top. We decorated the cookies with festive sprinkles in order to help get us into the holiday spirit. I highly recommend these to anyone- they're fairly easy to make, delicious, and a little unexpected.


Merry Christmas!

Orange Nutmeg Buttermilk Cookies

For Cookies
3 cups all-purpose flour
1 tsp grated orange zest (more if you wish)
1/2 tsp baking soda
1/2 tsp nutmeg
1/2 tsp salt
1 1/2 sticks unsalted butter, softened
1 1/2 cups granulated sugar
2 large eggs, at room temp
1 tsp pure vanilla extract
2/3 cup well-shaken buttermilk

For Glaze (this is half the original recipe, which I find is more than enough to frost the cookies)
3/4 cup confectioners sugar
1 tbsp well-shaken buttermilk
1/2 tbsp fresh orange juice

Make cookies:
Preheat oven to 350°F with one rack in the upper-middle position and the other rack in the lower-middle position. Line 2 large baking sheets with parchment paper.

In a medium bowl, whisk together flour, zest, baking soda, nutmeg, and salt.

Using an electric mixer, beat together butter and sugar in a large bowl until pale and fluffy. Add eggs 1 at a time, beating well after each addition, then beat in vanilla. Mix in flour mixture and buttermilk alternately in batches at low speed, beginning and ending with flour mixture, until smooth.

Drop tablespoons of dough about 1 1/2 inches apart onto baking sheets. Bake, 2 sheets at a time, until cookies are puffed and edges are golden, 12 to 15 minutes per batch, making sure to rotate the baking sheets halfway through the bake time. Cool cookies on sheets 1 minute, then transfer cookies to racks.

Glaze cookies:
Whisk together all glaze ingredients and brush onto tops of warm cookies. Add a flourish of sprinkled if you are so inclined.

Let stand until cookies are completely cooled and glaze is set.

Wednesday, November 9, 2011

More Brownie Pimping

Yes, I am trying to seduce you.
Oops, so it's been a few weeks since I've posted. I did make another batch of pimped brownies, but I got a little too excited about eating them...so I didn't get any pictures.

I also happened to have had a birthday in the meantime, so I didn't really do any baking that weekend. I did make ice cream (can't help myself), but it also disappeared before pictures were taken...

So yeah, I'm 29 now. In a year, I'll be 30. My metabolism is going to slow down. I will no longer be young and hip (okay, I was never hip). I would have thought I'd have my life a little more together by now, but I don't. I don't have a career to speak of (yay, economy!), I don't have a house, and I am perpetually single. But I do have a car! I also have a family that makes me laugh, a sister who is like a soul mate, a few good friends who love me despite my quirks, a dog that makes my heart tickle when I look at her, a cat who provides me with endless entertainment, and a passion for baking and dancing. So really, when I think of all that, I'm pretty rich, right?

To be honest, 28 was a rough year, and I was glad to see it go. Living alone has taught me a lot about myself. I've learned that I'm a pack animal, that I feel most at home with a small group. I've learned that the state of my apartment is a direct reflection of the state of my mind. I've also learned to reach out when I need help, a tough lesson for an independent girl like me to learn. 28 wasn't all bad, but I am certainly glad to have it behind me.

Now, for some brownies. No matter my age, I am still a brownie freak. A friend of mine suggested that the road to hell is paved with brownies, and I fear that that may be the gospel truth. Not much good comes of me baking and eating brownies, in the moral sense. We all know how it goes- you eat one piece, then go back for another little sliver, and another sliver, and before you know it, half the pan is gone and you wind up in a chocolate-induced stupor.

But I digress. I am still on a brownie-pimping kick and this time I think I've created something wonderful. I used the same base from my Milky Way Brownies, and this time doctored things up by adding a tablespoon of cocoa powder in exchange for one of the tablespoons of flour, and a half teaspoon of espresso powder. I also added a half cup of semisweet chocolate chips to the batter and sprinkled a mixture of milk chocolate, semisweet, bittersweet, and white chocolate chips on top of the batter before putting it in the oven. The result is divine (or downright evil, depending on your take). Maybe I should name these Quadruple Chocolate Seduction Brownies...

Eat me!
Quadruple Chocolate Seduction Brownies


4 oz semi-sweet chocolate, chopped
1 stick unsalted butter, cubed
1/2 tsp espresso powder
1 cup firmly packed light brown sugar
1 tsp vanilla extract
2 lrg eggs
3/4 cup + 1 tbsp all-purpose flour
1 tbsp cocoa powder
1/4 tsp baking powder
1/2 tsp salt
1/2 cup + 1/4 cup semisweet chocolate chips
1/4 cup milk chocolate chips
1/4 cup bittersweet chocolate chips
1/4 cup white chocolate chips

Preheat the oven to 350 degrees F. Line an 8-inch square baking pan with tin foil, then spray with a non-stick cooking spray.

Melt the butter in a small saucepan until foamy. Stir in the semisweet chocolate until smooth. Add the espresso powder and set aside to cool.

Stir the brown sugar and vanilla into the chocolate mixture. Add the eggs and stir until well-combined.

Sift together the flour, cocoa powder, baking powder, and salt. Slowly fold the flour mixture into the chocolate mixture. Stir in the 1/2 cup of semisweet chocolate chips. Pour the batter into the prepared pan. In a small bowl, combine the remaining chocolate chips, then sprinkle evenly on top of the batter.

Bake for 25-30 minutes, or until a tester comes out clean. Allow to cool completely (or for as long as you can bear).

Sunday, October 23, 2011

Operation Pimp My Brownie: The Beginning

Gooey...
I have a new mission in life, and it is called Operation Pimp My Brownie. In short, it involves taking simple brownie recipes and pimping them out to include things that I think pair brilliantly with chocolate. I don't want to reveal any secrets, but I already have several ideas brewing in my mind.

My first experiment was Milky Way Brownies. I did not have a recipe to go off of, so I took a recipe for classic brownies, and found a recipe for Milky Way Swirl cake, and doctored it to make it work. The end result was quite wonderful if you ask me. These brownies were sweet and chewy, a perfect little snack. I will certainly be making these again.

Tasty...
Milky Way Brownies


4 oz semi-sweet chocolate, chopped
1 stick unsalted butter, cubed
1 cup firmly packed light brown sugar
1 tsp vanilla extract
2 lrg eggs
a generous 3/4 cup all-purpose flour
1/4 tsp baking powder
1/2 tsp salt
6 fun-size Milky Way bars, chopped
2 tbsp milk

Preheat the oven to 350 degrees F. Line an 8-inch square baking pan with tin foil, then spray with a non-stick cooking spray.

Melt the chocolate and butter in a medium heat-proof bowl set over simmering water. Once smooth, allow the mixture to cool to room temperature. Melt the Milky Ways in a small saucepan with the milk and stir until smooth. Set aside to cool.

Stir the brown sugar and vanilla into the chocolate mixture. Add the eggs and stir until well-combined.

Sift together the flour, baking powder, and salt. Slowly fold the flour mixture into the chocolate mixture. Reserve 3/4 cup of the brownie mixture and pour the rest into the prepared pan. Combine the reserved brownie batter with the Milky Way mixture and stir until combined. Pour this mixture on top of the brownie batter in the pan.

Bake for 30-35 minutes, or until a tester comes out clean. Allow to cool completely.

Milky Way Glaze


6 fun-size Milky Way bars, chopped
2 tbsp butter
2 tbsp water

Combine the ingredients in a small saucepan and stir until melted and smooth. Pour the warm glaze on top of the cooled brownies and allow to set.

Enjoy!

Friday, October 14, 2011

The Hunt for the Perfect Oatmeal Cookie

Oh the yumminess...
Okay, so I have already blogged two recipes for oatmeal cookies: Oatmeal Raisin Cookies and Oatmeal Chocolate Chip Cookies. I have already declared my love for oatmeal cookies twice on this blog, and I fear I will have to do so again in this post. You see, I am on a quest to find the perfect oatmeal cookie recipe, one that I can use as a base recipe and change up the add-ins as fits my taste and the weather. I don't want to speak to soon, but I may have already found that recipe. Look out, folks, I feel an ode coming on...

Ode to Oatmeal Cookies
by Ray-Ray
oh, oatmeal cookie
with your soft and chewy
yet toothsome
sweetness
you fill my mouth with joy
you make my spirit bounce
and my tummy jiggle
your cinnamon and nutmeg and cardamom
flood my mind with memories
of home
and Fall
and crisp red and orange leaves
that crunch below my feet
like your crunchy edges
when I bite into you
I think about you
oh, oatmeal cookie
and I am reminded that life is good

I know, I know, I'm being silly. But I am very passionate about cookies. I can say definitively, nay, I can shout from the mountaintops and yell in the streets, that I love cookies. Love, love, love them. As in, I would do anything for them (but I won't do that*). And so, when I get my baking business up and running, cookies will be a major feature. I love baking them and I love eating them and I really love experimenting with them. Cookies are fun, folks!

So, back to these special cookies that I made last week. They are oatmeal with dried cherries, hazelnuts, and milk chocolate chips. The cookie itself was moist and chewy on the inside, crispy on the outside. And full of the flavors of Fall. Ideal, in my mind. So good, in fact, that I kept a lot of them to myself...

Cookies!
Oatmeal Chocolate Cherry Hazelnut Cookies
adapted from Baked:New Frontiers in Baking


1 1/2 cups all-purpose flour
1 tsp baking soda
1 tsp salt
2 tsp cinnamon
1 tsp nutmeg
1/4 tsp cardamom
2 sticks unsalted butter, softened
1 1/4 cups firmly packed dark brown sugar
1/4 cup granulated sugar
2 lrg eggs
1 tsp vanilla extract
2 3/4 cups rolled oats
1/2 cup dried cherries
1/2 cup finely chopped toasted hazelnuts
1/2 cup milk chocolate chips

In a large bowl, whisk together the dry ingredients (flour through cardamom), and set aside.

In the bowl of an electric mixer with a paddle attachment, beat the sugars and butter together on medium-high speed until smooth and creamy. Add the eggs one at a time, being sure to scrape down the sides of the bowl often. Add the vanilla and beat very briefly.

Add half of the flour and mix until just combined, then add the rest of the flour and beat until just incorporated. Scrape down the sides of the bowl and add the oats, beating until just combined. Stir in the cherries, nuts, and chocolate chips using a spatula.

Cover the bowl and refrigerate for at least 6 hours (trust me, this is necessary).

Preheat the oven to 375 degrees F. Line two baking sheets with parchment.

Using a size 20 scoop, drop the dough onto the cookie sheets, about 6 per sheet. Gently use your palm to press down on each cookie, just to flatten the top a little (do not smash!). Bake for 12 to 14 minutes, or until just golden.

Once removed from the oven, allow the cookies to remain on the baking sheets for 5 minutes before transferring to wire rack to cool completely (or until you can no longer stand it and have to taste a warm one...not that that's ever happened to me...).

Enjoy!

*Bonus points if you caught my Meatloaf reference.

Sunday, October 9, 2011

The First of the Fall Baking with Pumpkin Chocolate Chip Loaf and Butternut Squash Soup

Butternut squash and potatoes
Fall is finally here. I would say that Fall is definitely my favorite season, if anything for the baking alone. There are so many wonderful things to bake in the Fall: pumpkin pie, oatmeal cookies, spice cake with cream cheese frosting... Oh yes, Fall is all about the spices. Cinnamon, nutmeg, cloves, allspice, ginger, cardamom...these are the things that really excite me about the Fall. Besides, it sure makes my apartment smell nice.

I have decided that every weekend from now until Thanksgiving, I shall bake something with pumpkin. My first recipe was for Pumpkin Chocolate Chip loaves. Yes, loaves multiple, as in two loaves, because that is what the recipe produced. And I'm glad I made the full recipe. Seriously, these loaves were so delicious, so full of pumpkin and spice, that I really had a hard time not going overboard eating them...

As if baking pumpkin loaves were not enough, I also decided to make some butternut squash soup. Technically, it was intended to be a pumpkin soup, but I could not find any pumpkins for soup-making, so I went with butternut squash. I found the recipe for the soup in a French cookbook of mine, and the recipe said that it was both cheap and easy. This soup was so easy, it was ridiculous. And so tasty, even though it was so simple. A total winner, and likely to be a staple for me from now on.

Yummy!
Pumpkin Chocolate Chip Loaves
from Baked: New Frontiers in Baking

3 1/4 cups all-purpose flour
2 tsp cinnamon
1/2 tsp nutmeg
1/2 tsp allspice
1/2 tsp ground ginger
2 tsp baking soda
2 tsp salt
1 15-oz can pumpkin puree
1 cup vegetable oil
3 cups sugar
4 lrg eggs
1 tsp vanilla extract
1 12-oz bag semisweet chocolate chips

Preheat the oven to 350 degrees F. Butter and flour 2 9x5-inch loaf pans.

In a medium bowl, whisk together the dry ingredients (flour through salt) and set aside.

In a large bowl, whisk together the pumpkin and oil until thoroughly combined. Whisk in the sugar and then whisk in the eggs one at a time, followed by the vanilla. Stir in 2/3 cup room temperature water. Stir in the chocolate chips with a rubber spatula. Fold the dry ingredients into the wet and do not overmix.

Divide the batter between the two prepared pans and bake for about 1 hour and 15 minutes, or until a toothpick inserted in the center comes out clean. Make sure to rotate the pans half way through the baking time.

Transfer the pans to wire racks to cool for 15 minutes, then turn them out onto the wire racks to cool completely (or as long as you can stand before tasting them).


Warm and tasty!
Butternut Squash Soup
adapted from Francoise Bernard's Les Recettes Illustrees


1 kg butternut squash
2 small potatoes
1 L whole milk
1 Tbsp butter
salt and pepper to taste

Cut the butternut squash and potatoes into small cubes and put them in a large pot or dutch oven. Add the tablespoon of butter and a cup of water, cover, and cook over medium heat for 30 minutes or until the squash and potatoes are softened.

In a food processor, puree the squash and potatoes, then add the mixture back to the pot. Add the milk, salt and pepper and bring to a soft boil for about 20 minutes.

Enjoy!

Monday, October 3, 2011

A Week in Paris

Choclate tart from Fauchon
You may or may not have noticed that I have been MIA for a little while. Well, it's because I went to Paris last week. For those of you who don't know, I have my bachelor's degree in French and I studied abroad for 9 months in college. I then returned to France after receiving my degree and spent 7 months as a teaching assistant. Needless to say, during my time in France, I developed a love affair with French food and wine. And pastries. And chocolate.


Yellow always makes me happy
So why did I go to Paris this time? Mainly, I needed to get away. It had been a year and a half since my last vacation and I was just itching to get out of my hometown. Wanderlust seems to be embedded in my DNA, so I tend to get a bit stir-crazy if I go for to long without any travelling. I had also been missing France quite a bit, and when I saw a good deal on airfare, I jumped at the opportunity.


Drops
My other goal in going to Paris was to eat. And drink, but mostly eat. And eat I did, as you will see by these pictures (though I realize that there is no evidence that I consumed any of this food, but I am sure you know me well enough by now to know that I cannot look at food like this and not eat it). I ate plenty of pastries (some of which were eaten too quickly for me to photograph), and drank plenty of espresso and wine (not at the same time, mind you). Yes, Paris was delicious.

So good...
There were a few culinary highlights on my trip. The first, I would say, was the chĆØvre chaud salad I had on my second night at a nice little French bistro off the beaten track. What made this salad particularly special was that they drizzled honey over the warm goat cheese, which added depth to the dish. Seriously, I will be making this in the future. So freaking good.


Best salmon ever.
The second highlight was the salmon dinner I had at a cute little restaurant/bar near my hostel in Montmartre. It was a pavĆ© de saumon Ć  la provenƧale, which was essentially salmon and tomatoes and zucchini cooked in butter and served with rice. Butter makes everything taste so much better...


St. Honore
Thick and delicious
Another highlight for me was the chocolat Ć  l'ancienne that I had at Angelina. Story goes that Coco Chanel used to frequent this place, famous for its hot chocolate. The chocolate is served in a little pitcher and you are supposed to pour it into your cup, then you can add whipped cream (served in a dish alongside the pitcher of chocolate) to thin the chocolate out a little. Believe me, this stuff is thick. It is really like drinking melted chocolate. So decadent and tasty. To accompany my hot chocolate, I ordered a St. HonorĆ©, a pastry that I do not usually order (in fact, I'm not sure I've ever tried one). It turns out that I've been missing out on something that is pretty darn good. The puff pastry balls are filled with vanilla pastry cream, covered in caramel, and topped with Bourbon whipped cream. Very rich, but so very worth it.


Wine!
Royally delicious!
The biggest highlight came when I had a little picnic in the park. I bought a baguette, some sheep's milk cheese, a nice little bottle of Bordeaux, and a Royal Chocolat. The wine was really great, though I felt a bit self-conscious about openly drinking wine straight out of the bottle all by myself on a public park bench. The best part, however, was the Royal Chocolat. I already knew that that particular dessert was my favorite French patisserie. This one just happened to be the best I've ever had. Ever. Really. I would fly back to France right now just to get another one. While I was sitting on the bench, savoring this dessert, a French lady walked by and saw this wonderful treat and came and asked me where I bought it because it looked "trop bon." Yes indeed, it was "trop bon."

Magical macarons!
There were of course many other delectable goodies that I consumed. Pain au chocolat, which Americans simply cannot make well to save their lives. Then of course, there were crĆŖpes (yes, multiple, all with Nutella). And lest we forget, macarons! Yes, Paris was delicious, and I cannot wait to return...

Monday, September 12, 2011

Call Me the Queen of Custard

Ooh, Kit Kats and ice cream!
I have really enjoyed making ice cream this year. I find that it is one of the most rewarding baking experiences, since once you learn a few basic recipes, you can get as creative as you like. For example, I used a simple vanilla ice cream as the base recipe for my peanut butter honey swirl ice cream, and for today's recipe, I started with a malted milk ice cream base and added my personal touch of Kit Kats (my favorite candy bar of all time, always and forever).

Give me a break!
Let me first talk a little about my love for Kit Kats.Kit Kats and I go way back. Way, way back. One of my earliest memories is waiting on the couch in Michigan, some time at night, for my dad to return with a Kit Kat for me. I don't know the circumstances surrounding that situation, I just remember the anticipation of a Kit Kat. At Halloween, I always loved getting the fun size Kit Kats, and preferred the houses that gave those away. Later on, in high school, Kit Kats became a bit of an obsession/addiction of mine. I had one nearly every day it seemed. I would even go around singing the Kit Kat jingle (sadly, I still know the words to this day). There is just something about the combination of wafers and milk chocolate that does something to me. I'm a real sucker for anything with wafers and chocolate (there's not much I wouldn't do to get my hands on some of these Swiss delectables).

As for the ice cream, it has been hot lately and I had some egg yolks I needed to use up. In particular, I had 6 egg yolks to use, so I needed a recipe that called for exactly 6 egg yolks. Enter: malted milk ice cream. I had some whoppers that I could have added to the ice cream, but they weren't looking so good. Besides, I really love Kit Kats. The rest is history. Very creamy, delicious history.

Malted Milk Ice Cream with Kit Kats
adapted from The Perfect Scoop


1 cup whole milk
3/4 cup sugar
pinch of salt
2 cups heavy cream
1/4 tsp vanilla extract
2/3 cup malted milk powder
6 lrg egg yolks
18 small Kit Kats, chopped

Warm the milk, sugar, and salt in a medium saucepan. In a large bowl, whisk together the cream, vanilla, and malted milk powder and set a fine mesh strainer on top.

In a medium bowl, whisk together the egg yolks. Slowly whisk the warm milk into the egg yolks, then scrape the mixture back into the pan.

Stir the mixture constantly with a heat-proof spatula over medium heat until the custard thickens and coats the back of the spatula. Pour the custard through the strainer and stir the mixture until smooth and consistent.

Chill the custard overnight in the fridge. Freeze the ice cream in an ice cream maker according to the manufacturer's instructions. At the end of the churning cycle, stir in the chopped Kit Kats.

Enjoy!

Monday, September 5, 2011

PiƱa Colada Cake and the Big Screw-Up

Come with me and escape!
Do you like piƱa coladas? Well, I do. I don't think you can go wrong with the combination of pineapple and coconut, especially when we're talking about cake.

My family decided to celebrate Labor Day this year on Sunday so that everyone would have Monday to recover. What exactly we were supposed to be recovering from, I am not sure, so I figured I'd booze up our little shindig to give everyone something to recover from. To that end, I made this piƱa colada cake (which has rum in it), and a white sangria. My dad made a red sangria, so for those of us who were imbibing, there was plenty of alcohol. Not that we're lushes or anything. We were simply enjoying the last hurrah of Summer that is Labor Day weekend.

Sunken middle :(
The party was one of my family's less eventful affairs. For me, the highlights were renaming my sister Frakah Khan (and then my nephew deciding my sister should name her baby Frakah Khan), and having a little dance party with my sister and my nephew. I taught my nephew how to do the sprinkler, the blender, the bump, and the dip. He really took a liking to the blender, and he had me dip him over and over again until I thought my arm would fall off. I tried teaching the kid how to do the running man, but he took one look at that move and said, "no, me can't do that." Ah well, one day...

Holey piƱa colada cake, Batman!
I suppose there was one minor event during the preparation of my family's get-together: I screwed up the cake. I prepared it perfectly, but it turned out that I did not bake it long enough. Yeah, I undercooked the cake. I was very upset about this because I was really looking forward to enjoying the cake. Luckily, it was only the top part of the center of the cake that was not cooked all the way, so I simply cut a hole into the cake, glazed the cake, and filled the hole with pineapple. Problem solved! In the end, despite my little mistake, the cake was still delicious, moist, and tropical. Perfect for an end of Summer treat.

PiƱa Colada Cake
from here

2 cups all-purpose flour
1 tsp baking powder
3/4 tsp baking soda
1/2 tsp salt
1 stick unsalted butter, softened
1/4 cup light brown sugar
1 tbsp dark rum
2 lrg eggs, at room temp
1 cup cream of coconut
1/2 cup finely chopped fresh pineapple
1 tbsp rum, +2 tsp for glaze
2 tbsp pineapple juice, +2 tsp for glaze
1 cup powdered sugar
pinch of salt

Preheat oven to 350 degrees F. Butter and flour a 9-inch cake pan and line the bottom with a circle of parchment paper.

In a medium bowl, whisk together the flour, baking powder, baking soda, and salt. In the bowl of a stand mixer, beat the sugar and butter until light and fluffy, about 2 minutes. Add the eggs one at a time, being sure to scrape down the sides of the bowl. Mix in the rum and cream of coconut until combined. In two additions, mix in the dry ingredients on low speed. Mix until just combined. Fold in the pineapple chunks.

Pour the batter into the prepared cake pan and bake in the center of the oven for 35-40 minutes, until a toothpick inserted in the middle comes out clean (and make sure the cake does not jiggle!). Cool the cake on a wire rack for 10 minutes, then invert onto another wire rack. Poke holes in the cake using a toothpick, then drizzle over the mixture of 1 tbsp rum and 2 tbsp pineapple juice. Allow the cake to cool completely.

To prepare the glaze, whisk together the powdered sugar, pinch of salt, and rum and pineapple juice. Slowly drizzle the glaze over the cake, trying to get it even over the top.

Enjoy!


Friday, September 2, 2011

Peach Champagne Cake and the Case of the Missing Passport

Peachy!
I am fairly certain that I have lost both my mind and my passport. Both seem to have evaporated into thin air. I have searched high and low, looking in the same drawers and boxes four or five times each and nada. Nothing!

It's a little bit funny to me that the one time I plan a transatlantic trip on short notice, I cannot find my passport. What's really funny to me is the fact that I'm doing this trip to kind of recharge myself and do a little soul-searching, and in the meantime, I cannot find the piece of identification necessary to go on said soul-searching journey. I have lost my identity and it is time for a new one!

Okay, okay, none of that has anything to do with this fabulous cake I made for my coworker's birthday. This cake was actually my first commissioned cake (ordered by my boss), so I felt a little bit of pressure to make it special. I decided on peach champagne because it is Summer and I thought nothing says Summer like peaches and champagne. Plus, I've never made a champagne cake before, so this was a good opportunity to give it a try.

The cake was delicious. Moist and light and bubbly. Like champagne! And it was peachy! A nice Summer celebration cake, and very easy to make. In the future, I might use this cake as a jumping point for a kir royale cake, or a champagne chambord cake...

So delicious!
Peach Champagne Cake
adapted from here


2 sticks unsalted butter, at room temp
2 cups sugar
1 tsp vanilla
6 egg whites
3 cups all-purpose flour
3 tsp baking powder
1/2 tsp salt
3/4 cup dry champagne
1/4 cup peach schnapps

Butter and flour 2 9-inch cake pans, and cut out two circles of parchment to put into the bottom of the pans (after buttering, before flouring- makes for a very easy removal). Preheat the oven to 350 degrees F.

Combine flour, baking powder, and salt in a medium bowl. In the large bowl of a stand mixer, beat the butter and sugar until light and fluffy, 3-5 minutes. Add in the vanilla and beat in the eggs whites, one egg white at a time (be sure to scrape down the sides of the bowl often).

Add in one third of the flour mixture at a time, mixing on low just to combine, then alternate by adding in half of the alcohol mixture. Repeat until all ingredients are combined.

Pour the batter into the prepared pans and bake for 30-35 minutes (depending on your oven).

Peaches and Cream Filling


1 peach
1 cup whipping cream
1 tbsp sugar

Peel the peach and dice it into small pieces. In a medium bowl, beat the whipping cream and sugar together on high speed with a hand mixer until stiff peaks form. Gently fold in the peaches.

Peach Champagne Frosting


1 1/2 sticks unsalted butter, at room temp
4 cups powdered sugar
1/4 cup champagne
1 tbsp milk
1 tsp peach schnapps
1 tsp vanilla
1 drop red food coloring

Beat the butter and vanilla together using the whisk attachment in a stand mixer. Add the sugar one cup at a time. Beat in the liquid ingredients.

Mmm, pretty...
To assemble the cake:
Cut the tops off of the cakes to create a level working surface (easier said than done, folks). Place one layer on your serving surface of choice (I had a cardboard cake circle). Spoon out about a cup or so of the peaches and cream filling on top of the cake and smooth it out to within 1 inch of the edge of the cake. Place the second layer of cake on top of the layer of filling, making sure to center it. Start by frosting the top and sides of the cake with a thin layer of frosting (to cover up the crumbs). Now add the rest of the frosting and smooth it out however you like (I like the rustic look, personally). For the top of the cake, I cut 7 thin slices of peach, soaked up the extra juice with a paper towel, brushed them with lemon juice, and fanned them out in a circle on top of the frosting. Voila! A celebration cake!

Saturday, August 27, 2011

Nutella Brownies or When Two Loves Combine

Nutella Brownies!
It is no secret: I love brownies and I love Nutella. Should I ever be forced to choose between one or the other (as in, I can only have one for the rest of my life), I think I would implode. Or I would choose these brownies, because it combines my two loves.

Don't judge...
I did not always love Nutella. My first impression of it was that of indifference; I could take it or leave it. That all changed when I studied abroad in Poitiers, France. Nutella became an addiction. True story: I would carry a jar of Nutella in my backpack in case I acquired a warm, fresh baguette from a bakery. Warm baguette + Nutella = Heaven (yes, I said that in a sing-song voice). Yes, I developed a deep, loving relationship with Nutella. This relationship, of course, was not good for me or my wardrobe. Let me just say that, regrettably, most of the clothing I had gone to France with did not fit me by the end of my time there.

I have since scaled back on the Nutella binges. In fact, I don't binge on it at all- too much sugar for me. I like my sweets, but I don't like them that sweet. Nutella is now just an occasional moment of bliss. My attachment is a lot less obsessive and is now more of a fondness.

Brownies, on the other hand, are still an obsession. The song Bad Romance comes to mind, for some reason. I get these really intense cravings for brownies (fudgy ones, of course), and then when I bake them, I go a little crazy with them. I'll eat one square and call it good, but sure enough, about half an hour later, I'm back at the pan, cutting myself "just a sliver" of brownie. Before I know it, a third of the pan is gone and my stomach is screaming at me for overdoing it. And then the guilt sets in. Brownies should come with a warning: contains guilt as a main ingredient. Yes, brownie is that bad lover that I keep returning to, no matter how many times he mistreats me. What can I say? I must be some kind of masochist...

Anyway, back to the Nutella Brownies. Were they good? Hells yes. Especially when served with my homemade coffee ice cream. You want to know the best part? These brownies were flipping easy to make. Seriously, way super easy. A drunken toddler could make these (note: I do not condone plying toddlers with alcohol). So, if you're really wanting brownies and have a large jar of Nutella on hand, I say go forth and bake these babies. You're welcome.

Gooey!
Nutella Brownies
from here

1/2 cup all-purpose flour
1/4 tsp salt
1 stick unsalted butter, softened
1 cup sugar
2 eggs
1 tsp vanilla extract
1 cup Nutella

Preheat the oven to 350 degrees F. Prepare an 8-inch square pan by spraying it with cooking spray.

Combine the flour and salt in a small bowl. In a medium bowl, beat the butter with a hand mixer until light and fluffy. Add the sugar and beat until combined. Add the eggs and vanilla and mix thoroughly. Beat in the Nutella and mix until incorporated. Stir in the flour mixture.

Pour the batter in the prepared pan and bake for about 30 minutes. Allow to cool in the pan on a wire rack. These suckers are pretty stellar warm and served with ice cream.

Enjoy!

Monday, August 22, 2011

Lemon Loaf and Life Lessons

Most of the loaf was eaten before I took a picture...
"Make the most of yourself, for that is all there is of you." -Ralph Waldo Emerson

Well, folks, my blog has officially reached it's first anniversary. That means I actually stuck with this for a year! I am proud of myself for sticking with it, given how many projects I've started in the past, only to abandon a few days or a few weeks later.

I've actually had a weekend full of proud moments. It all began with an epiphany that I had on Thursday when I went for a walk during a break at work. I've been feeling restless lately, a bit trapped, uncertain of my future and questioning whether there was a light at the end of the tunnel. During that last walk (and I've been taking many walks lately), it suddenly hit me: I need to not return to school in the fall and instead focus on baking. Specifically, I need to focus on starting a business for my baking. It is a scary thought, something I've toyed with in the past, but never took too seriously. In the end, however, I think it is time that I really gave a dream a chance to see the light, instead of keeping it trapped in my mind.

Once I had that breakthrough, things began to seem a little more clear to me. I am not trapped. I am free to make whatever decisions I feel are best, as this is my life, and I'm the only one living it. I've also only got one chance at this life, so I need to make the most of it. It has also helped to have some good friends to talk to and to remind me who I really am. I am a strong person, and I am not alone.

With this new outlook, I managed to fill what started out as a no-plans 3-day weekend with lots of activity. I took a drive in the country all by myself (which I had never done before), and wound up on some country roads that reminded me of a roller coaster; at one point, I came over a hill where I could not see the bottom, so I just yelled, "wooooo!" and enjoyed the ride. It was a nice little adventure. I also went to a party where I managed to speak a little French,as well as talk to strangers and join in conversations I was not originally a part of (something that usually makes me nervous). On Saturday I met up with two different friends across the river and did some exploring over there on my own for a bit (another first). During that adventure, I ate the most delicious grilled sandwich ever at The Grilled Cheese Grill: the Jaime, which had mascarpone, nutella, and bananas on cinnamon swirl bread. I almost died of happiness. I'm glad I didn't die, though, because Sunday morning I had another such moment with some peanut butter pancakes at Screen Door. It was a solid weekend with new adventures and plenty of time spent with good friends.

And so now I will share with you the recipe for the lemon loaf I made this weekend. Still not sure if it's a bread or a cake, but I don't really care. It tastes good. Sometimes I just get a lemon craving, and this satisfies that. It's a burst of sunshine, when that is what you need in your life. Also, my boss told me that it's the best lemon pound cake she has ever tasted, so I feel pretty good about it.

Lemon Loaf
adapted from Baked: New Frontiers in Baking


3/4 cup cake flour
3/4 cup all-purpose flour
1 tsp baking powder
1/8 tsp baking soda
1/2 tsp salt
1 1/8 cup sugar
4 lrg eggs at room temp.
grated lemon zest from 2 lemons
2 tbsp fresh lemon juice
2 sticks unsalted butter, melted and cooled
1/4 sour cream at room temp.
1 tsp vanilla extract
1/3 cup limoncello

Preheat the oven to 350 degrees F. Coat a 9x5-inch loaf pan with nonstick cooking spray. Fit a small sheet of parchment paper in the bottom of the coated pan and coat with cooking spray.

Sift the flours, baking powder, baking soda, and salt together in a medium bowl.

In a food processor, combine the sugar, eggs, lemon zest, and lemon juice and pulse to combine. With the motor running, drizzle the butter in through the feeding tube. Stop the machine and add the sour cream and vanilla and pulse to combine. Pour the mixture into a large bowl, then stir the dry ingredients in in 3 additions. Stir until just combined.

Pour the batter into the prepared pan, then bake at the center of the oven for 20 minutes. Rotate the pan and turn the heat down to 325 degrees F and cook for another 30-35 minutes, until a skewer inserted in the center of the loaf comes out clean.

Allow the loaf to cool on a rack for 15 minutes. Invert the loaf onto a sheet of parchment and poke holes into the top and sides of the loaf. Use a pastry brush to brush the loaf with limoncello, allowing the limoncello to seep into the holes. Let cool to room temperature before serving.

Wednesday, August 17, 2011

Emergency Chocolate Cake

Sorry, this is the only picture I got; I was a bit excited about eating the cake...
So my blog has been on hiatus for a few weeks, mostly because I did not bake any new recipes. Okay, so that's not entirely true- I did make some muffins, but they weren't good enough to write about. Instead, I made coffee ice cream and my famous chocolate chip cookies because I was in the mood for something familiar.

But I'm back with a recipe for Emergency Chocolate Cake from Cook's Illustrated. I'd been feeling a bit of the summertime blues last week, so I figured an easy chocolate cake was what the doctor ordered. While the cake did not actually fix anything, it got me back in the baking spirit. It was also delicious.

No, what really is really helping me right now is a reminder from one of my best friends. I remember feeling this way when I studied abroad, and I told my friend about it. She reminded me that I got through that time, had the best time of my life after it, and if it were not for that, we would not be such good friends. Sometimes you need a friend who has been there for you before to remind you of just how strong you are. So I'm back. And I want to share a poem that has been playing in my mind today: Invictus.

Emergency Chocolate Cake
adapted from Cook's Illustrated


7.5 oz unbleached all-purpose flour
7 oz sugar
1/2 tsp baking soda
1/4 tsp sea salt
2 oz Dutch-processed cocoa powder
2 oz bittersweet chocolate, chopped fine
1 cup hot coffee
2/3 cup mayonnaise
1 lrg egg
2 tsp vanilla extract

1. Adjust oven rack to middle position, preheat oven to 350 degrees F, and coat an 8x8-inch baking dish with nonstick cooking spray.

2. Whisk the dry ingredients together in a large bowl. In a medium bowl, combine the chocolate and cocoa powder, then pour the hot coffee over it and whisk until smooth; let cool. Whisk in the remaining ingredients. Stir the wet ingredients into the dry ingredients and stir until combined.

3. Pour the batter into the prepared baking dish and bake for about 30 minutes, or until a toothpick inserted in the center of the cake comes out clean.

4. Allow cake to cool on wire rack. The cake can be eaten plain, or served with ice cream.

Sunday, July 24, 2011

Limoncello, the final result

Limoncello!
So, remember how I told you all a month ago that I was making limoncello? Well, it is finally finished. You see, the Everclear had to soak up all of the lemony goodness of the lemon peel from 15 lemons for 3 weeks before I could add the sugar water and eventually transfer the mixture to bottles for serving and sharing. The end result is very lemony and rather potent. It is best served chilled and sipped slowly...

I have already told you my limoncello story (in the link above), so here I am going to take the time to talk about a favorite person of mine. A person who happens to love lemons. In fact, on the 4th of July, I asked this person what his favorite fruit was and he listed the following: blueberries, strawberries, raspberries, and lemons. This person is my three-year-old nephew.

Yes, aside from Positano, lemons also make me think of my nephew, and how when he was a baby he would suck on lemons as though they were candy. Yes, he puckered his lips when eating a lemon, but he seemed to love the experience. This was back when he made Zoolander lips...

But now he is getting a little bit older and getting more of a personality. He's a little bit bossier, but he's also as sweet as can be. Just last night he was sitting next to me at a restaurant, telling me all of the things he wanted to do at my apartment, and then he suddenly stood up, turned around, threw his arms around me and told me, "I love you, Ray-Ray. I love Lucy and Enzo too." It's moments like these that I wish I could preserve in a bottle to enjoy later. But I will take them as they come.

This potent liqueur should be sipped.
Limoncello


1 750ml bottle Everclear
15 lemons (preferably organic)
3 cups sugar
2 1/2 cups water

Scrub the lemons and peel them, being sure not to get any of the white (which is bitter). Put the peels in a 2-quart mason jar, then cover with the Everclear. Let sit in a cool, dark place for 3 weeks, shaking the mixture daily.

Combine the sugar and water in a saucepan and bring to a boil. Boil until the liquid is clear and the sugar has dissolved. Allow to cool for 30 minutes. Strain the Everclear-lemon mixture and pour back into the mason jar.  Add the sugar water and allow to cool to room temperature, then chill in the fridge overnight. Transfer the limoncello to sterilized 8-oz bottles. Makes about 7 bottles.

Enjoy!

Sunday, July 17, 2011

Strawberry-Rhubarb Sorbet

What a pretty color!
I've been a bit lazy about writing this blog post for two reasons: writer's block and crappy weather. I made sorbet while it was sorbet weather, but that sorbet weather was replaced with a week of clouds and rain and misery. Okay, maybe that's a little overly dramatic, but seriously, you can't give me sunshine and heat and then just suddenly take it away and expect me to be happy about it. I understand that there are worse things in the world than bad weather, but I also refuse to believe that my feelings are invalid.

So anyway, sorbet. I don't usually eat sorbet because I'm more of a rich, creamy dessert girl than a fruity girl. But we were talking about strawberries and rhubarb that needed to be used up toute de suite, so I gave it a shot. I'm very happy I did. Not only was the sorbet ridiculously easy to make, but it was very delicious. Perfect on a sunny day...

I also discovered something about sorbet this week: you can create a sort of make-shift margarita with it. Just take a scoop or two of sorbet, add some tequila and triple sec, et voila! Margarita! Just make sure to use proper measurements because eye-balling the measurements is terribly dangerous...

Strawberry-Rhubarb Sorbet
from The Perfect Scoop


12 oz rhubarb, cut into half-inch pieces
2/3 cup water
3/4 cup sugar
10 oz fresh strawberries, rinsed and hulled
1/2 tsp freshly squeezed lemon juice

Put the rhubarb, sugar and water in a medium saucepan and bring to a boil. Reduce the heat, cover, and let simmer for 5 minutes or until the rhubarb is softened. Remove from the heat and let cool to room temperature.

In a food processor, combine the rhubarb mixture, strawberries, and lemon juice and pulse until smooth. Chill the mixture in the fridge overnight.

Freeze the mixture in your ice cream maker according to the manufacturer's instructions.

Enjoy!