Pages

Thursday, February 24, 2011

Snow Day Brownies

Snowy Perfection
Let me begin by saying I do not completely trust weather reports. I feel rather jaded by all of the false reports of inclement weather over the years. Perhaps that is just the nature of meteorology in the good ole Pacific Northwest. It goes without saying that I was feeling rather doubtful about the prediction for snow this Thursday. Imagine my pleasant surprise when I woke up Thursday morning and peeked through the blinds of my bedroom window to see powdery white stuff everywhere. It had snowed! As predicted!

Granted, I live in a bit of a weather vortex, so snow was not covering the entire metro area, but my metro area was covered in snow. And it was pretty. My dog, Lucy, seemed a little skeptical. It was her first legitimate snow, so she didn't know what to make of it. When chunks of snow came off of her fur when we got inside, she decided snow was quite tasty.

Anyway, snow meant I was not going in to work. I had a bad experience last year when my car stalled and ran me into a curb and then I was stranded at the library for an hour before being rescued, so I just do not take any risks with the weather. My life is worth more than a day's work, if you ask me. So, since I did not go into work, I stayed in and got some cleaning done, watched this week's Glee, and made brownies. I've been needing brownies for awhile, so it was good to finally satisfy my craving.

Boy, am I satisfied. These brownies are bomb. Really. They have that indescribable quality that only really good fudgy brownies have. I am of the belief that if it is not fudgy, it is not a brownie. I'm in fudgy heaven as we speak. Perfect for a cold white day like today. :)
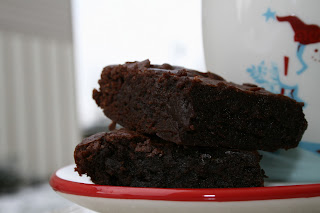

Fudgy!

The Baked Brownie
from Baked: New Frontiers in Baking

1 1/4 cups all-purpose flour
1 tsp salt
2 tbsp dark unsweetened cocoa powder
11 oz dark chocolate (60-72%), coarsely chopped
1 cup unsalted butter, cut into 1-inch pieces
1 tsp instant espresso powder
1 1/2 cups granulated sugar
1/2 cup firmly packed light brown sugar
5 lrg eggs, at room temp
2 tsp pure vanilla extract

Preheat the oven to 350 degrees F. Butter the sides and bottom of a 9x13-inch pan.

In a medium bowl, whisk the flour, salt, and cocoa powder together.

Put the chocolate, butter, and instant espresso powder in a large bowl and set it over a saucepan of simmering water, stirring occasionally, until the chocolate and butter are completely melted and smooth. Turn off the heat, but keep the bowl over the water and add the sugars. Whisk until completely combined, then remove the bowl from the pan. The mixture should be room temperature.

Add 3 eggs to the chocolate mixture and whisk until combined. Add the remaining eggs and whisk until combined. Add the vanilla and stir until combined. Do not overbeat the batter at this stage or your brownies will be cakey.

Sprinkle the flour mixture over the chocolate mixture. Using a spatula (not a whisk), fold the flour mixture into the chocolate until just a bit of the flour mixture is visible.

Pour the batter into the prepared pan and smooth the top. Bake in the oven for 30 minutes, rotating the pan halfway through the baking time, until a toothpick inserted into the center of the brownies comes out with a few moist crumbs sticking to it. Let the brownies cool completely, then cut them into squares and serve.

Enjoy!
Tea and brownies!

Monday, February 21, 2011

Funk Betty Balls


Colorful Yumminess
That's right. Funk Betty Balls. Okay, so a little back story here. Way back when, at some time, my mom misheard either my sister or me saying "funfetti," as in funfetti cake, so she thought we said "funk Betty." Mind you, my mom mishears a lot of things. She also likes to make up words. Like schnoll. I'm still not sure what a schnoll is, but pretty sure it came out of a guessing game (as in, someone may have been drawing a schnoll). Anyway, it makes for a pretty good family inside joke. Or a band name.
Anyway, so this week I set out to make cake balls. I had heard about them for some time and tried some really good pumpkin ones back in the fall. I knew I wanted to make my mark by making them with funfetti cake mix and frosting. Who doesn't like funfetti? They're so colorful and magical, and look perfect for a celebration. But I'm not celebrating anything except the awesomeness that is existence.

I have to say, my Funk Betty Balls were quite a success, if by success, me eating several throughout the day counts. But my nephew scarfed one down and my coworkers seemed to appreciate them.

The Funk Betty Balls were actually pretty easy to make, no need for a recipe, really. Here's what you do:

1. Make a box cake mix according to the package, baking it in a 13x9-inch pan.

Cut into the cake

The Cake in the Bowl
2. After the cake has cooled, crumble it up in a large mixing bowl. Dump 1 tub of frosting into the cake crumbles. Mix together with a spatula, then cover and freeze for about an hour, or until scoopable.

The cake and frosting mixture. Appetizing...
3. Scoop the cake mixture into 1-tbsp sized balls. I used a small cookie scoop. Place the balls on a parchment-lined baking sheet and freeze for about an hour or until fairly cold and solid.
Balls in the freezer.
4. When it is almost time to pull the balls out of the freezer, melt some white chocolate or dark chocolate in a double boiler. If melting white chocolate, make sure to keep a very close eye on it, stirring constantly, and make sure it does not burn.

5. Pull the balls out of the freezer and, one at a time, dip into the melted chocolate. I used two forks for dipping and still found it to be very messy. Place the balls back on the parchment. Sprinkle sprinkles on top of the balls right away if using.

Pretty Little Funk Betty Balls!
6. Put the sheet of balls into the fridge to harden before transferring to a plate or some reusable containers. I keep the balls in my fridge so they don't get melty.


Enjoy!
I covered some in semisweet chocolate after running out of white chocolate.

Sunday, February 13, 2011

Vegetarian Taco Pizza

Ready to eat
 Last night I hosted a girls' bunco night at my new place. My sister, her friend, and I are trying to get a monthly thing going, and this was month two. I chose for a theme Valentine's Fiesta. I'm not entirely sure why, I guess I just wanted Mexican food. I decided fairly early on that I wanted to try my hand at making a vegetarian taco pizza. I am a vegetarian, and I love tacos and pizza. What better way to combine two awesome things?!

Fresh out of the oven
I looked online for a recipe, but didn't really find anything. So I decided to wing it. Turns out, winging it can bring pretty awesome results. My plan involved Trader Joe's pizza crust, refried beans, fake taco meat, salsa, cheese, sour cream, avocado, olives, green onions, and red pepper. And whatever else I could think of. Sadly, I ended up with no green anything on my pizza. You see, I couldn't find green onions at Trader Joe's, and the avocado I bought turned out to be bad. But my pizza was awesome anyway.

Vegetarian Taco Pizza
created by me

1 prepared pkg of pizza dough (I use Trader Joe's)
1 pkg fake seasoned taco meat
1 can refried beans
1/4-1/2 cup salsa
1 pkg shredded Mexican cheese
1/2 red pepper
1/4 cup sliced black olives
1/4 cup sour cream

Cook the taco meat according to the directions on the box. Heat the refried beans in a small saucepan. Prepare the pizza dough according to the package directions.

Ready for the oven
When the dough is ready, roll/stretch it out and put it on a lightly greased baking sheet. It should spread all the way out to the edges. Next, spread the salsa over the crust, making it as thin or as thick as you like. Then, spread all of the refried beans over the top of the pizza. Next, spoon all of the taco meat over the beans. Then, sprinkle as much or as little cheese as you like over the whole pizza (I like lots of cheese), and then sprinkle the diced red peppers and sliced olives over the top. Sprinkle with a little more cheese.

My pizza cooked in a preheated oven at 450 degrees F. It took longer than the directions on the pizza dough package- a total of about 20 minutes, maybe a few more. The crust should be brown on the under side. Take the pizza out of the oven and serve straight from the pan, or transfer to a cutting board and serve from there. Before slicing, pour the sour cream in a baggie and cut a hole in one corner. Squeeze the sour cream evenly over the top of the pizza to your liking. Slice and serve.

On the plate, with love
Enjoy!

Saturday, February 12, 2011

Broyé de Poitou and a terrible presentation

Tasty
Well, folks, as you may or may not know, I am currently taking some paralegal classes part time. I am in my second term and it has been brutal. It hasn't helped that since the beginning of winter quarter I have moved and for three weeks did not get much sleep, but it is also harsh because I have a ton of class work for both of my classes, on top of working full time and belly dancing. So when at the beginning of the term I found out that my employment law class required we give an international presentation and that food was encouraged, I knew right away what I had to do. I knew I would give a presentation on French labor law (having worked in France myself), and I knew I would bring in a Broyé de Poitou.

If you recall, for Christmas I received the really awesome book Around My French Table by Dorie Greenspan. My grandmother was the proud giver of said present, and as soon as I opened it I started flipping through the pages and admiring the lovely pictures and recipes. When I came to the dessert section and found a broyé, I nearly cried. You see, when I studied abroad in Poitiers, France, one of the first local delicacies I remember trying is a broyé (along with a Pineau de Charentes and a torteau fromagier, which can also be found in the book). It is a delectable giant butter cookie that you are supposed to be able to break with your fist, but I tried and tried and had to just break it by hand. It is the perfect baked good for sharing with a group. Naturally, it would be a great thing to present to my class.


Unbroken
And I did present it to my class. But the rest of my presentation was not so good. You see, I have this little thing called anxiety and when I get in front of a group of people, despite liking talking in front of people, I get really really nervous and my body starts to shake and my voice comes out a little louder than usual. It's a real train wreck. I have to plant my weight evenly on both feet or else my one leg will begin to shake uncontrollably. Then I become terribly frustrated and embarrassed because my physiological reaction to being in front of people is far worse than how I feel about being in front of people (which I enjoy, normally). So, when I gave my French labor law presentation, I kind of forgot half of what I wanted to say and my notes were useless because I can't focus enough to read when I'm in front of a crowd. But at least the broyé was good!

Salted Butter Break-Ups (Broyé de Poitou)
adapted from Around My French Table

1 3/4 cups all-purpose flour
2/3 cup sugar
3/4-1 tsp sea salt
9 tbsp cold unsalted butter, cut into 18 pieces
3-5 tbsp cold water
1 egg yolk, for the glaze

     Put the flour, sugar, and salt in a food processor and pulse to combine. Drop in the pieces of butter and pulse until the mixture looks like coarse meal- you'll have both big and small chunks. With the machine running, start adding cold water gradually: add just enough water to produce a dough that almost forms a ball. When you reach into the bowl to feel the dough it should be very malleable.
     Scrape the dough onto a work surface, form it into a disc, and pat it down to flatten it a bit. Wrap the dough in plastic and chill it for about 1 hour.
     When you're ready to bake, center a rack in the oven and preheat it to 350 degrees F. Line a baking sheet with parchment  paper.
     Remove the dough from the fridge and, if it's very hard, bash it a few times with your rolling pin to soften it. Put the dough on a lightly floured work surface and sprinkle some flour on top of the dough. Roll the dough into a round or oblong shape until about 1/4 inch thick. Transfer the dough to the lined baking sheet.
     Beat the egg yolk with a few drops of cold water and, using a pastry brush, paint the top surface of the dough with the egg glaze. Using the back of a fork, decorate the cookie in a crosshatch pattern.      Bake the cookie for 30 to 40 minutes, or until it is golden. It will be firm to the touch but have a little spring when pressed in the center. Transfer the baking sheet to rack and allow to cool to room temperature.


All broken up

Note: Do not put to much water in the dough, as it will make for too soft (but not in a good way) cookie. Break the cooled cookie apart by hand- don't even try to break it using your fist, unless you're made of steel.

Monday, February 7, 2011

Saturday Afternoon Tea with Frakah

Scones!

As you may or may not know, my sister and I are a little obsessed with afternoon tea. Not that fussy, frilly old lady tea with lots of floral patterns and doilies. Our tea is more of a come-as-you-are tea. Our tea tends to involve foods created out of whatever we have on hand. In short, our tea rocks.

Tea Time
My sister, Frakah, and I have been doing afternoon tea for several years now. It's not a regular thing (yet), but it's something we really enjoy doing when we can. I'm not even sure how it all began. Perhaps it was when my brother got married and I threw my SIL-to-be a bridal shower tea. I catered the whole thing with mini scones, mini cupcakes, and four types of mini tea sandwiches (curried chicken salad, cucumber, smoked salmon, and caprese). I discovered that preparing tea foods is a lot of fun and allows for much creativity. It is really fun to think up new tea sandwiches and fun desserts to pair with tea.

Lately, my sister and I have been tossing this idea around for our own tea house/bake shop. We both love to bake and love tea and we also have a bizarre sense of humor. Why not have a tea shop that involves all of those things? So we got together on Saturday to discuss our ideas over tea.

Charlotte
My contributions to the tea were buttermilk scones, wasabi cucumber sandwiches, and a strawberry charlotte I picked up at La Petite Provence. I found the scone recipe on foodgawker, and the sandwich I came up with myself. You see, last Monday I went to the Crystal Ballroom to see the Bellydance Superstars, and before the show my mom and I had dinner in the pub below. I ordered a delicious ahi tuna sandwich with wasabi mayo. I've known for awhile that I really love the tuna-wasabi combo, but I thought, why not use wasabi mayo in other sandwiches. Hence, wasabi cucumber tea sandwiches.

Frakah's contributions to the tea were some lemon-ginger straws, lemon curd, and some savory saucer scones. I'd forgotten how much I love lemon curd and it paired nicely with the giant scones I made. The straws were tasty, but looked nothing like the picture in the recipe.

Frakah and I enjoyed our feast, of course, and we were stuffed to the brim by the end (as we usually are). Afternoon tea is always a good time- the food is good and it's nice to have company.
Samwiches

Wasabi Cucumber Sandwich

2 slices white bread
1 tbsp cream cheese
1 tbsp mayonnaise
1/2 tsp wasabi paste
1 1/2 tsp chopped fresh mint
9 thick cucumber slices

Spread the cream cheese on one slice of bread. Combine the mayo and wasabi and mix until thoroughly combined. Spread wasabi-mayo mixture onto other slice of bread. Sprinkle chopped mint over the cream cheese. Arrange the cucumber slices, slightly overlapping, on the cream cheese slice of bread. Top with the other slice of bread. Cut into squares. Enjoy!

Frozen scones!
For the scone recipe, follow this link. Note, you are given the option to cut the disks into quarters or eights. I chose quarters and wound up with some huge-ass scones, even though they looked small when I cut them Do not be deceived! They will grow and become very puffy!

Thursday, February 3, 2011

Pudding Success!

Ahhhhhhh...

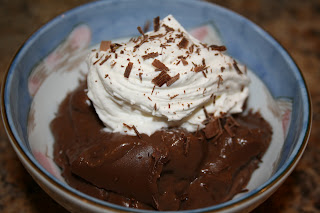
Well, folks, I am glad I made pudding tonight. Pudding, to me, is the ultimate comfort food. No food is more soothing to my soul than good ole chocolate pudding. And that is precisely what I needed tonight. You see, after I made my pudding, my dad called me to let me know that he and my mom had our family cat, Spooky, put down tonight. She was 15 years old and lived a good life and was apparently having kidney failure. She was a good cat- just aloof enough, yet also came around for attention from time to time. She used to be good friends with my dog Ducky, but he was put down a year and a half ago.

So there you have it. I guess you can see that I'm an animal person. Luckily my papillon, Lucy, knows just how to cheer me up. She hates seeing me sad and always stays right by my side. But aside from Lucy, pudding makes for a good consolation.

It's funny because I was already needing the comfort of pudding because it is the dead of winter and I tend to get SAD. This year has been the worst, probably because I'm not running this winter (damn you, stupid knee!). Dancing helps cheer me up for the most part, but dancing also happens to be both the best and the worst thing for my self esteem...


But anyway, back to this fabulous pudding win. After last week's failure, I decided to go for a pudding recipe that called for egg yolks and cooking the custard over direct heat. This pudding came together so quickly, it was finished before my potato (which was cooking, hasselback-style, in the oven). Last week's pudding had me standing over the stove for nearly an hour with no thick result. This week, the pudding turned thick quite quickly!


Gloppy

And now that I've had a bowl, I can say it was quite delicious and was just what I needed. It was thick, it was chocolatey, and I could taste the butter in it. It's a good thing I live by myself, because that means I don't have to share the rest of it with anyone. Mwahahahahaha!

For the recipe, go to this link.